
TRANSMISSION, Uncategorized
How to Install a 47re Transmission on a 2nd Gen Dodge
Swapping or installing a transmission in your truck might seem like a daunting task. However, with the right tools, a little help, and know-how, this is something you can do in your garage. Myer is going to walk you through the steps of installing a 47re transmission on your 2nd gen Dodge.

Preparing to Remove the Transmission
First, we have the truck on a lift. We recognize not everyone has this option, but everything we are going to show you is the same whether your truck is on a lift or on the ground.
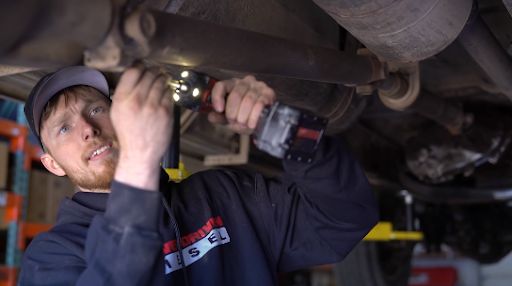
The first steps to getting the transmission out are to remove the skid plate (if you have one) and the drive shaft. The skid plate is simple, you just remove four 15 mm bolts. The drive shaft can be a little more difficult as the bolts can become seized and rounded if you are not careful. We recommend using an impact driver, 6-point socket and making sure you have a solid, straight connection with the bolt.

Pro Tip: If any of these bolts are seized, use heat to loosen them.
Depending on your vehicle and year, you may also have a support bearing on the drive shaft. Again, depending on the vehicle this may be a 15mm or 16mm nut and bolt configuration. Once this is off, set the rear drive shaft aside, then move on to the front drive shaft.
Since Dodge did not include a transmission drain from the factory, the next step is removing the pan and doing your best to not make a huge mess. Myer’s preferred method is to remove all bolts except for two in the front and two in the back of the pan. Once this is done, loosen the two rear bolts and let the fluid begin to drain from the back of the pan. You can then loosen the front bolts to help get more out of the pan.
Pro Tip: Use a wobble socket extension to remove the back bolts while minimizing the amount of transmission fluid getting on your tools.
![]()
Once you have approximately half the fluid out, and the fluid is below the edge of the pan, hold the pan in place, remove the last bolts and drop the pan completely. The transmission will continue to drip ATF. Remove the cooler lines using a 15/16” and a 3/4” wrench. The transmission cooler lines will drip a bit of fluid so have your drain pan available.
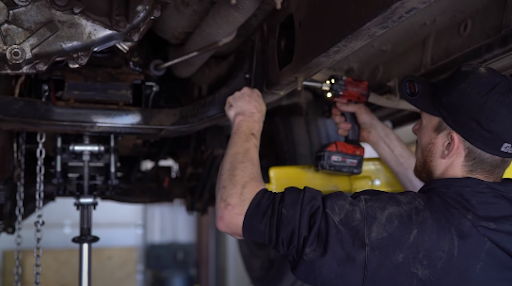
Next it is best to remove or disconnect all plugs, linkages, sensors, etc. on the sides and top of the transmission.
Pro Tip: If you have dirt, grime, etc. preventing any clips or connections from coming off, use an air hose to blow out any dirt or mud.
![]()
Because of the way the shift rod works and is connected to the truck and transmission, it can get in the way while you remove the transmission. We recommend disconnecting it from the transmission as well as the frame. This will allow you to move the shift rod to the side and keep it out of the way while you remove the transmission.
Next, disconnect the transfer case mount from the transmission. This is simply removing two 16 mm bolts. Space is tight, so a pivot ratchet is useful. The linkage is attached with a rubber grommet, use a pry bar to pry it apart from the transfer case.
Replace the transmission fluid pan and you’re ready to drop the transmission.
![]()
Dropping the Transmission
With a transmission jack under the transmission, you can begin removing the cross member by removing two 15 mm nuts holding the trans mount to the cross member. Now we’re going to get the cross member out.
Once all the bolts are out there’s two ways to remove the cross member:
One: Just grab a very large hammer and beat the cross member up and then beat it back.
Two: Use a frame spreading jack spread the frame just enough to get the cross member loose and it just falls out.
We’ll go ahead and use the frame spreader, but a big hammer definitely works and lots of people have done it.

With the frame spread, you can simply go up and then down with the cross member to remove it. Next, we’re going to remove the transmission mount from the actual trans by removing two 15 mm bolts and then switch to a 5/8” socket and remove the final bolts.
Now we need to remove the torque converter bolts. There are six of them and you have to take off a little access panel held on by two ten millimeter bolts to access the torque converter bolts.
Pro Tip: It can be a tight fit to remove the access panel, so you can use a couple of extensions and do all the work from the front of the truck.

To remove the torque converter bolts (9/16” or 5/8”), you need to spin the engine around to get all of them through the access panel. Simply spin the crank over with the 15 mm damper bolts and watch for the bolts in the panel.
The final step for us, since we have the truck on a lift, is to remove the bell housing bolts. There are eight 9/16” bell housing bolts. We recommend using a long extension to get through the wiring and remove these bolts.
If you are doing this on the ground, you are likely going to remove the transfer case separately. This is done by simply removing the six 9/16” nuts. The best way to do this is to get a box end wrench and then drop the trans down a bit to allow access between the floor and the transmission. Then pull all the nuts off and slide the transfer case out.
With the bell housing disconnected (and the transfer case out if applicable), guide the transmission down and out from the truck.
![]()
Cleaning and Preparing for the New Transmission
Your transmission, truck underbody, and more is likely filthy from a lifetime of dirt, debris, and road grime. Use this chance to get a pressure washer out and clean up your truck and transmission.
Also, if you are not upgrading your cooler lines (you should, and we have them available here), it’s necessary to blow out any debris. The setup to blow out the lines is easy – take the stock fittings out of the transmission, then connect that to the hard lines. Next, clamp some half inch hose around the other end of the fitting to create a fixture to blow air through the cooler. Put the drain end into a bucket to watch what’s coming out of the line. When it starts coming out clean, you know your set for the next step.


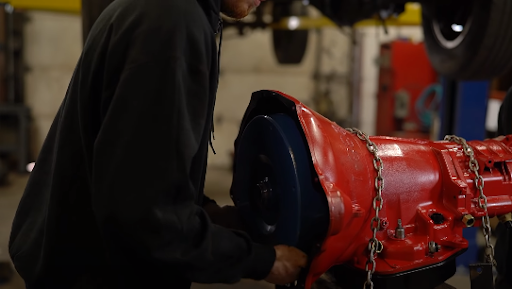
Swapping Out the Flex Plate
If you’re upgrading to a higher power transmission, it is necessary to swap out the stock flex plate with a heavy duty unit. Stock flex plates are only good to approximately 350 horsepower.

Remove the eight 18-mm bolts holding on the stock plate. Then, line up the holes on the new plate and snug up the bolts. We then use a dial indicator to measure the runout of the new flex plate. Turn the crank and stop at each hole to ensure the plate is installed evenly and square. If the plate is over 18 thousandths out at any hole, you can use a pry bar to help square it up.

Since the flex plate was initially installed on dry, we recommend removing four bolts at a time and adding red Loctite® so they don’t come loose in the future.
Preparing the New Transmission for Install
With the new flex plate installed and the cooler lines cleaned, let’s get the new transmission ready for installation. With the new transmission on the jack, swap over the transmission temperature sensor, cooler lines, brackets, and/or anything that came off with the old transmission that you are not replacing.

Before installing the torque converter put a quart of transmission fluid in to ensure the bearings, etc. are protected. To install the torque convertor, first, ensure that the pump tangs on the convertor and the transmission are aligned. Then, cradle the convertor and press it into place while rocking it slightly. Make sure you are providing plenty of support to the convertor during installation and not letting it hang on the input shaft. You will know it’s in place when you can’t fit your hands behind the convertor and it’s about ¾” from being flush with the bell housing.
Installing the transfer case can be pretty difficult depending on your garage/workspace. This is best done with someone to help you. You need to line up the splines on the output shaft then rotate the transfer case until the studs line up. Once the studs are aligned, use a nut to hold the transfer case in place while you tighten down the rest of the nuts.
Installing the New Transmission
Pro Tip: To ensure you’re putting your torque convertor bolts in the correct holes in the flex plate, take note of where the balance holes are in the flex plate before installing the transmission.
Raise the transmission into place and rotate to line up the two dowels in the adapter plate’s mating face and the corresponding holes in the transmission. Once these are lined up, with a bit of pushing and prodding, things should begin to sit flush. Make sure the torque converter is not being pinched or restricted. Do this by spinning the converter from underneath the transmission. If things spin freely, snug in a couple bolts and spin again to make sure the converter still moves with no resistance. If there is still no issue, do a few more bolts and continue to spin. Over the course of a typical installation, we will check that the torque converter spins freely five or more times to ensure everything is lined up and working correctly.
![]()
Take note of which type of dipstick you have when installing. If you have the type that installs with a grommet, install the grommet, and add a bit of oil or lubrication to press the dipstick into place. If you are working with an O-ring seal, these can be problematic, add sealant to the O-ring to help it get a good seal and prevent leaking down the road.

Use a long extension to install the torque converter bolts with red Loctite®. Get them installed early so the bolts have as much time to dry before a first fire. We recommend getting all the torque converter bolts started and nearly seated then go back and tighten them down. On a lower horsepower vehicle, a torque wrench works fine to lock things into place. On a high-power vehicle, use an impact driver to tighten them and prevent them from coming loose.
With the torque converter bolts and the bell housing bolts in, start hooking up your drive lines, brackets, connectors, and the cross member. Install the cross member the same way you took it out, using a spreader or hammer to coax it into place. With the cross member in place, you can remove your jack and finish the install of the last bolts and connections.
Check Line Pressure and Test Drive
Before dropping your truck and filling it with fluid, it is important to hook up a line pressure gauge so you can check for any pressure issues.

Once the gauge is hooked up, it’s time to put in some PDD transmission fluid. We start with eight quarts and run it for 10 seconds. We then stop the truck and check the fluid level to make sure there are no false readings. The fluid level should be around the S-bend in the dipstick. After checking and adding fluid, if necessary, check level with the truck running, in neutral. It’s time for a test drive while checking line pressure.
At idle in drive we should be in the 80 to 90 psi range, depending on horsepower level. Giving it a little throttle, the pressure is approximately 110 psi. At cruising, line pressure should be about 130 psi. Flat-footed, pressure should be about 150 psi, this can vary depending on your trans power rating.

We’re Here to Help
If you have any questions about swapping or upgrading your transmission, give us a call. We have a dedicated team ready to answer your questions and help you out.
Give us a call at 435-962-9555 or text us at 435-962-9506 or leave us a comment below. Don’t forget to follow us on YouTube, Facebook, and Instagram for more product tests. Leave us a comment below about what you’d like us to cover next.