
TRANSMISSION, Transmissions, Uncategorized
How to Install a Transmission Cooler Line
Dec
In our latest visit to The Parts Bin, PDD team member Dustin is going to walk you through how to install our new transmission cooler line replacement kit. This kit is a cost effective way to upgrade and replace the stock cooler lines, which are prone to cracks and leaks as the 89-02 Cummins engines accumulate miles. Read on for installation instructions.

What’s Included in Your Transmission Line Replacement Kit
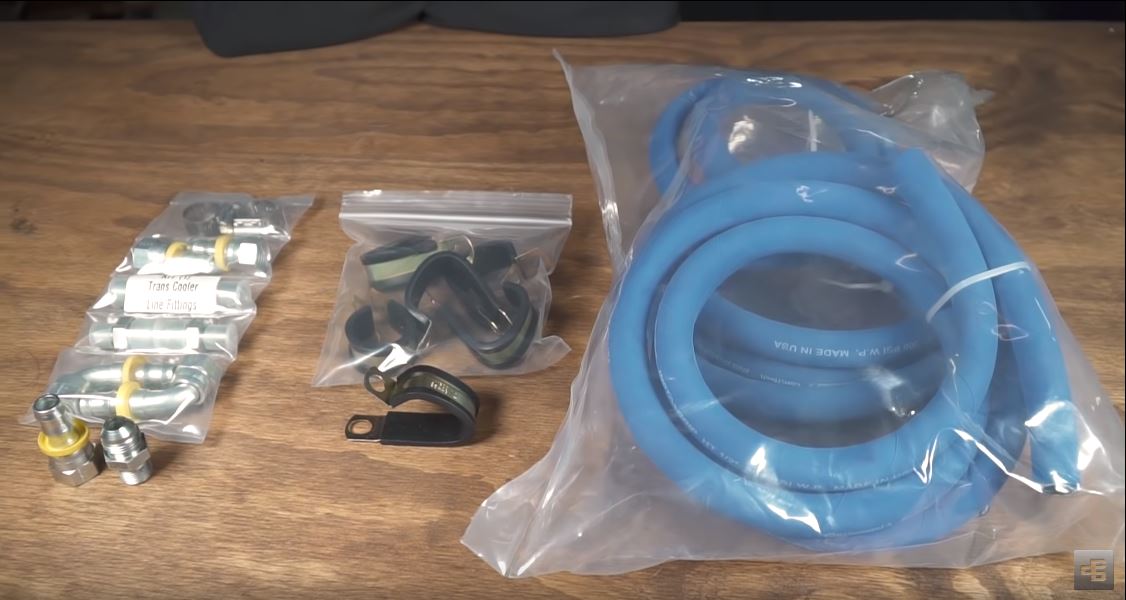
When you order a cooler line replacement kit from Power Driven Diesel, you will get everything you need to swap out the stock cooler lines. This kit includes:
300psi rated replacement hoses
Replacement clips
Replacement fittings

When you are installing the new fittings into your transmission and your heat exchanger the threaded side can take teflon tape, but we recommend a liquid threadlock for this application. We recommend Loctite 545. Also, for the press on fittings, be sure to have oil/lubrication and a heat gun available. Be sure not to overtighten the fittings as they can crack the transmission case.

Note: If you have an RH transmission, you will receive additional external fittings for the transmission sensor. Make sure to include your factory temp sensor in line with these fittings.

How to Remove Old Transmission Cooler Lines
We like to remove all the old lines from the transmission before prepping or messing with the new lines. This allows a clean transmission to work with. First, we remove the outlet on the transmission and remove the inverted flare fitting. Repeat with the inlet then install your new ½” fittings for the new lines. Again, be sure not to overtighten the new fittings

Follow the lines to your heat exchanger and disconnect the lines from the fittings. Once the lines are unhooked, remove the flared fittings for both the inlet and the outlet. With the stock fittings out, you can now install your ⅜” fittings in both the inlet and the outlet.

With the heat exchanger finished, you can now follow your lines up past the oil pan to the air cooler to the notoriously leaking rubber hoses. These hoses are in kind of a tough spot, but it is possible to remove them without taking out your air cooler. Simply remove the hose clamps and hoses.

Running New Transmission Cooler Lines
We have found that the easiest way to make sure you match the hoses to the correct inlets and outlets is to follow the following guide:
Transmission Outlet: The outlet is at the front of the transmission and goes to heat exchanger inlet, which is the rear port on the exchanger
Heat Exchanger Outlet: The front port on the heat exchanger goes to air cooler inlet, which is the forward port
Air Cooler Outlet: The rear port is the outlet and goes to the back of the transmission to the inlet
We recommend you hard connect one end of your line, then run it exactly as it needs to. This will help you determine proper placement and length of the hose, preventing crossover, etc.
And that’s about it. With the proper preparation, you can swap these leaky old lines in your garage. As always, if you have any questions about this or any other product, give us a call or reach out below. We’re here to help.
Give us a call at 435-962-9555 or text us at 435-962-9506 or leave us a comment below. Don’t forget to follow us on YouTube, Facebook, and Instagram for more product tests. Leave us a comment below about what you’d like us to cover next.